Hyderabadi Dum Biryani Recipe | How To Make The Best Hyderabadi Dum Biryani


Hyderabadi Dum Biryani, one of the most sought after dishes on restaurant menus, has been yummefy-ed to up the gastronomic quotient of your table. This Mutton Dum Biryani recipe yields an ambrosial combination of fragrant rice and succulent meat, topped with the sublime flavours of fried onion (birista), saffron, ghee, lime juice, and mint.
Our Hyderabadi Mutton Dum Biryani recipe or Hyderabadi Gosht Biryani is a layered dish of rice and meat. It owes its origin to the city of Hyderabad, which was formerly ruled by the Nizams, the monarchs of the former state of Hyderabad. This Biryani is thus sometimes referred to as the Nizami Biryani. A well-made, authentic Hyderabadi Dum Biryani is a piece of culinary art, which is a treat to the eyes as it is to your taste-buds. When served, the sealed lid of the vessel is removed to reveal aromatic long-grained rice in hues of saffron, birista made from browned onions, and a garnish of mint leaves.
The origin of the Hyderabadi Dum Biryani recipe:
Though the place of origin of biryani is a subject of heated debate among biryani connoisseurs, the origin of the word Biryani itself has been traced back to Persia. The word Biryani comes from the Persian word ‘Birian’ which means 'fried before cooking'.
Hyderabadi Dum Biryani is said to have been created in the royal kitchens of the Nizams of Hyderabad who had a penchant for luxurious dining. Spices which are now common, such as cumin, black peppercorns, cardamom and saffron were prized ingredients in the Mughal era. The generous use of another prized ingredient, ghee, in the recipe, befitted a royal feast. Meat or mutton too, used liberally in this recipe, could only be afforded by the wealthy. However, as with most biryanis across the country, the royal cooks developed their own local flavour. Here, they also included fried brown onions (birista or beresta) to imbue the biryani with a deep, rich flavour.
What is Dum cooking:
The term ‘Dum’ in the Hyderabadi Dum Biryani refers to the Dum technique of cooking. Biryani is cooked in a heavy bottomed vessel with a lid. The biryani in the vessel is given the ‘dum’ or breath, by covering the vessel with a lid and sealing it with dough. When sealed and cooked over a slow fire with pieces of burning coal on top the lid for even heat, the flavours and aroma of the Biryani develop within, steaming in their own juices.The time cooking on dum is usually 30 minutes but can vary from 10 minutes to 45 minutes depending upon the heat being applied, the state of the ingredients - cooked (pakki) or raw (kacchi), etc.
What is kacchi biryani vs pakki biryani:
Traditionally, there are two methods followed for making biryani—pakki and kachhi. In pakki biryani, cooked or partially cooked rice and cooked (pakki) meat are stacked in alternating layers in one handi and then given dum together till aromatic. In kacchi biryani, partially cooked rice and uncooked (kacchi) marinated meat are placed in layers and then cooked on dum till done. Obviously, the time needed on dum for a kacchi biryani is much longer than pakki biryani as the meat needs to cook. Our Hyderabadi Dum Biryani recipe is a pakki biryani and hence the dum biryani dum time is just 10 to 15 minutes.
What is birista:
Fried browned onions, also known as ‘Birista’ or “Beresta” are one of the integral components of this best Hyderabadi Dum Biryani recipe. Birista lends a depth of flavour to the Hyderabadi Dum Biryani. While preparing the Birista, all care should be taken that the onions are not over fried. Birista takes some time and patience to cook. While frying, they can turn from golden-brown to dark in no time, and dark burnt onions will make this dish bitter. We need the slight sweetness of the golden fried onions to make this biryani flavourful.
Working ahead:
Biryani-making can be a tedious and time consuming process, but we have simplified it for you in our step-by-step Hyderabadi Dum Biryani video. To save time, you could make the biryani masala powder one day ahead and store it in a bottle with a tight lid. You could also marinate the mutton the night before the actual cooking day. The use of desi ghee and fragrant long-grained rice cannot be stressed enough. Traditionally, local rice grown in the region where biryani was being cooked was used. There are several very fragrant local varieties of rice out there waiting to be explored.
We also suggest you have your Mise en Place or ingredients prepped and gathered and ready on the kitchen counter before you proceed with the actual cooking. It is also very important to note that the rice should be just over half cooked (cooked for about 5 minutes or so) in the first stage of cooking. The cooking of the rice is subsequently completed during the process of dum. Overcooking rice will result in a mish-mash rather than a biryani.
A variety of biryanis:
The biryani assumes various forms as it travels around India, and even the world. Those who relish a good keema can try our Keema Biryani recipe. Or if you want a mutton biryani variation from further south, then Ambur Mutton Biryani should hit the spot. If someone prefers chicken over mutton, you can cook for them, the Chicken Biryani Hyderabad Style. And Fish Biryani, Moplah Kerala-Style is for those who love their fish and rice combination dearly. Prawn Biryani can be rustled up for those who want another seafood variant.
If Masala Egg makes your day, why not take it one step further and make a Masala Egg Biryani? Or if you are vegetarian or have vegetarian guests or family members, whip up a mean Veg Dum Biryani, Kathal or Jackfruit Biryani, or even a Corn Biryani. There are countless options to choose from!
Serving Hyderabadi Dum Biryani:
Our mutton dum biryani recipe can be made for lunch or dinner. Though dum biryani Hyderabadi style is one-pot meal, which is a feast in itself, a little garnish goes a long way in making it the star of the table. You could garnish the mutton dum biryani dish with beaten edible silver, also known as chandi ki varq. Place a few freshly plucked mint leaves in the center of the vessel, and atop the varq for a royal feel. Alternatively, it may be garnished with birista (fried onions) and mint. Ginger juliennes, slit green chillies, and mint are other garnish options.
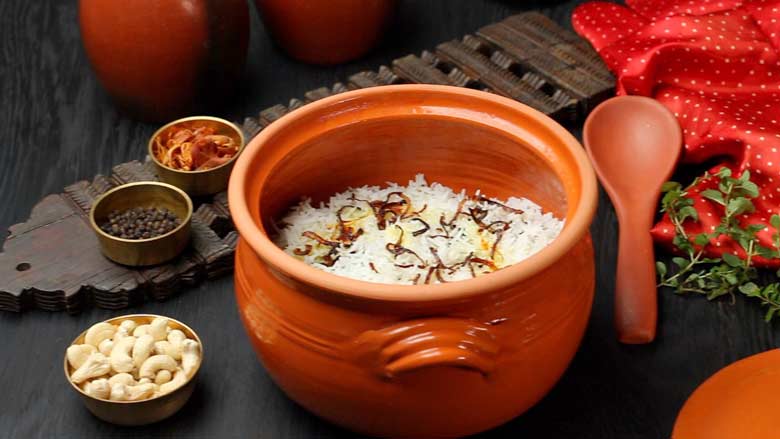
Serve the Hyderabadi Dum Biryani in a metal handi or in an earthen pot. Biryani is often eaten with Mirch ka Salan, Raita, Kachumber, and Baghare Baingan.
Learn how to prepare Dum Biryani Hyderabad Style at home with all ingredients and easy cooking method from the recipe below.
If you enjoyed making this recipe, you may also like our:
Kacche Gosht ki Biryani
Yakhni Pulao
Chicken Kofta Biryani
Aloo Chutney Pulao
Kala Chana Pulao
Chicken Masala Fry
Village Style Chicken Biryani
Konkani Cucumber and Pomegranate Salad
Or see all our Meat Recipes right here!-
-
RECIPE
INGREDIENTS
Rice:
250 grams rice, about 1¼ cups, preferably basmati or other long grain variety
1 bay leaf (tej patta)
2 cloves (laung)
2 green cardamom pods
1 teaspoon salt, or to taste
Marinade:
500 grams mutton, shoulder with bone, cut into 1-inch x 2-inch pieces
2 teaspoons garlic paste
2 teaspoons ginger paste
1 teaspoon salt, or to taste
Masala Powder:
7 cashew nuts
1 piece cinnamon (dalchini), ½-inch in length
1⁄2 teaspoon black peppercorns (sabut kali mirch)
1⁄4 teaspoon caraway seeds (shahi jeera)
1⁄2 blade mace (javitri)
1 1⁄2 teaspoons khus khus (poppy seeds)
1 tablespoon roasted chana dal (bengal gram)
- 60 ml ghee, about 4 tablespoons
60 ml oil, about 4 tablespoons
250 grams onions, about 2½ medium onions, each cut in half then finely sliced and fried in the ghee and oil mentioned above till golden brown. crush fried onions once cool. reserve ghee – oil mixture. yields about ¾ cup fried onions. divide in 2 equal parts and reserve.
- 1 bay leaf (tej patta)
2 cloves (laung)
1 piece cinnamon (dalchini), about ½-inch in length
1 teaspoon red chilli powder, mild
1⁄2 teaspoon turmeric powder (haldi)
200 ml yogurt, about ¾ heaping cup, made from whole milk or full cream milk
2 green chillies, deseeded, finely chopped
2 tablespoons coriander leaves, chopped
1 tablespoon mint leaves, chopped
- 1⁄4 teaspoon garam masala powder, (see link for recipe in method below)
3 teaspoons lime juice, divided use
1 large pinch saffron, soaked in 3 tablespoons warm milk
1 teaspoon ghee
COOKING METHOD
- Clean and wash the rice: Place rice in a bowl and wash under running water, gently stirring and mixing the rice with your hands, draining each time the bowl fills up. Do this 2 or 3 times till the water runs clear; then let soak in fresh water, covered, for 30 minutes.
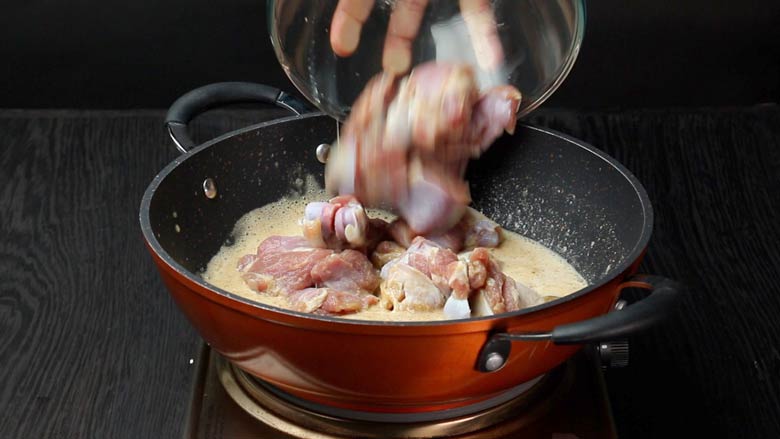
- Marinate meat: Place the mutton in a glass bowl or other non-reactive bowl. Add garlic paste, ginger paste, and 1 teaspoon salt. Mix well, ensuring that the mutton is evenly coated. Cover and set aside to marinate for 30 minutes.
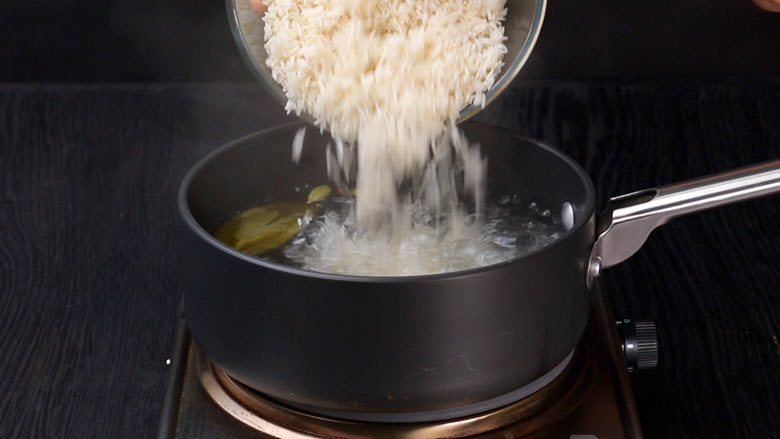
- Cook rice: Drain soaked rice. Place a large saucepan over medium heat and pour in 1¼ liters water (about 5 cups). Bring water to a boil, then toss in bay leaf (tej patta), cloves (laung), green cardamoms (hari elaichi), and 1 teaspoon salt. Stir once and then bring back to a boil. Tip in drained rice and simmer for about 5 minutes, stirring occasionally, till the rice is half cooked. Drain the rice and set aside.
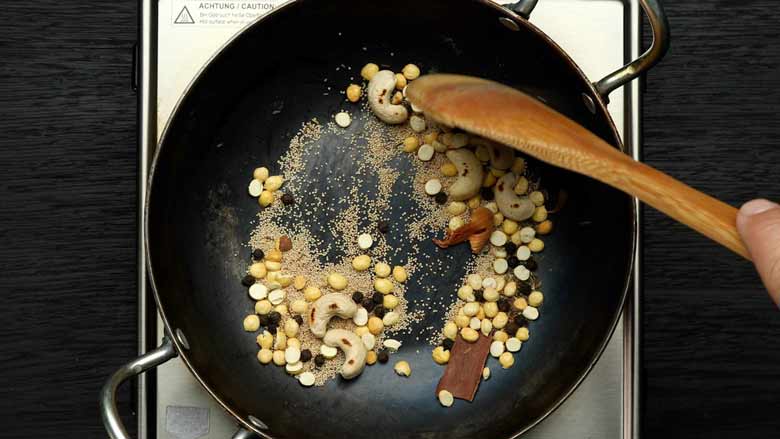
- Roast masala powder: In a small kadhai or wok over low heat, add cashew nuts, cinnamon (dalchini), and black peppercorns (sabut kali mirch). Give it a good stir, then caraway seeds (shahi jeera), mace (javitri), poppy seeds (khus khus), and roasted Bengal gram (roasted chana dal). Stir continuously, dry roasting till aromatic. Remove from the kadhai or wok and set aside to cool on a plate.
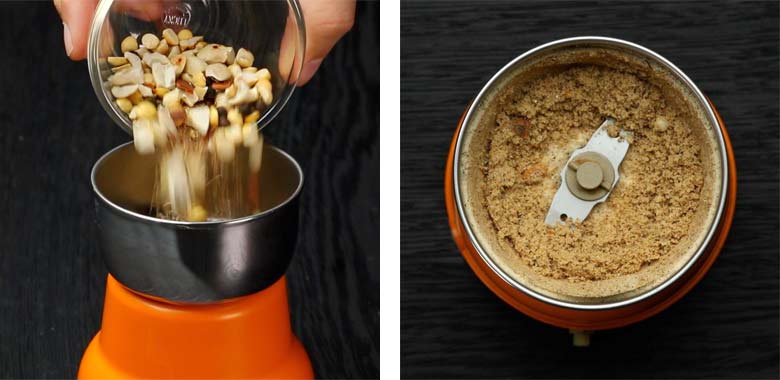
- Make masala powder: once the roasted spices have cooled, transfer to a spice grinder and grind to a fine powder. Reserve.
- Place a large kadhai or wok over high heat. Pour in 3/4th of the ghee-oil mixture reserved after frying onions. Once hot, toss in bay leaf (tej patta), cloves (laung), and cinnamon (dalchini). Stir till the cloves plump up and look swollen, then add the prepared masala powder (step 5). Stir vigorously before tipping in marinated mutton. Stir till the masala coats the mutton well, about 1 minute. Toss in red chilli powder and turmeric powder, and continue to sauté till the mutton is nicely browned, 7 to 8 minutes.
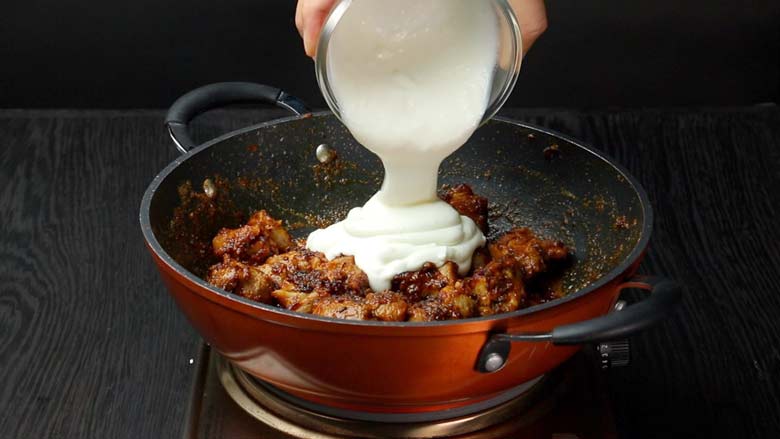
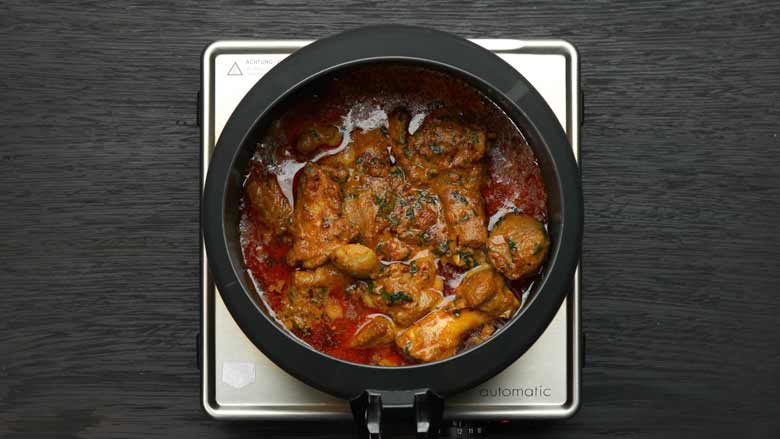
- Add half quantity fried and crushed onions (birista) into the browned mutton, mix well, cook for about 2 minutes. Reduce heat to low and pour in yogurt, add green chillies, coriander leaves, and mint leaves. Stir vigorously and continuously so that the yogurt does not curdle. Bring to a boil and transfer to a pressure cooker over high heat. Pour in 120 ml water (about ½ cup), stir, bring back to a boil, then seal the pressure cooker. After the pressure cooker reaches full pressure, usually indicated by the first whistle, reduce heat to low and continue cooking for about 15 minutes. Remove from heat and allow the cooker to cool before opening it. Stir in 1½ teaspoons lime juice.
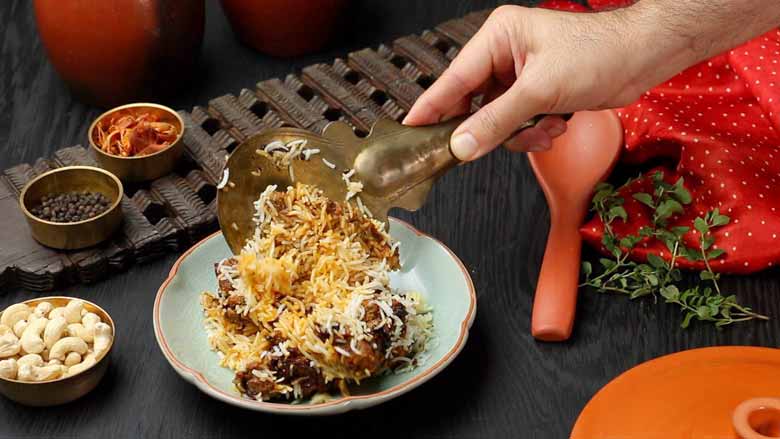
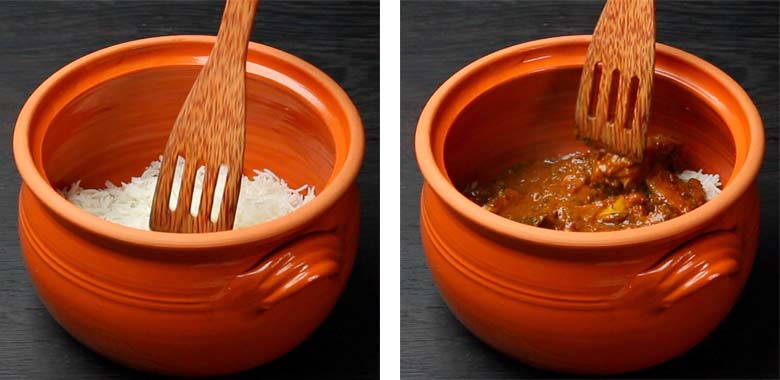
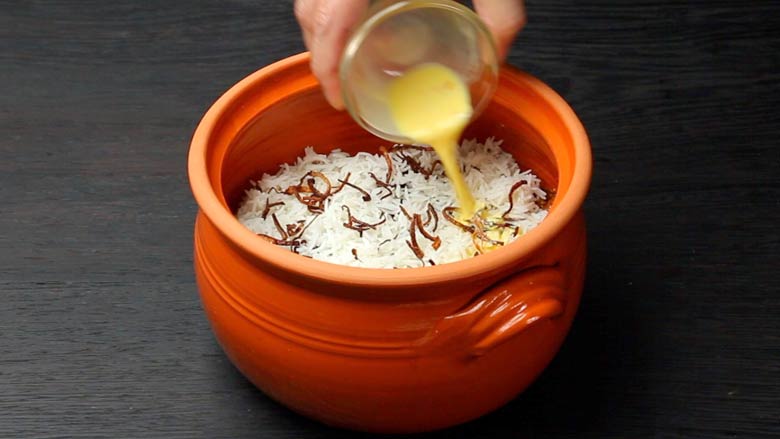
- Assemble the biryani: Pour the remaining 1/4th of the ghee-oil mixture reserved from frying onions into the bottom of a biryani handi or another deep pan with a tight-fitting lid. Divide rice in two part and layer one part into the biryani handi / pan spreading it across the bottom. Evenly spread the cooked mutton masala on the rice, top with fried onion (leaving a small handful for later) and sprinkle on garam masala powder. Spread the remaining rice on the mutton, then finish by spreading remaining fried onion, 1½ teaspoons lime juice, and saffron with soaking milk. Cover with the tight-fitting lid, sealing with whole-wheat dough if possible, and place on dum for 10 to 15 minutes. Remove from heat and allow the biryani to rest for 5 minutes.
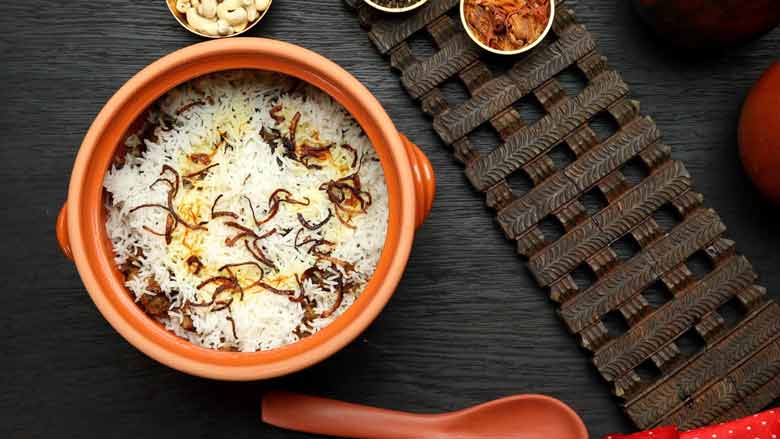
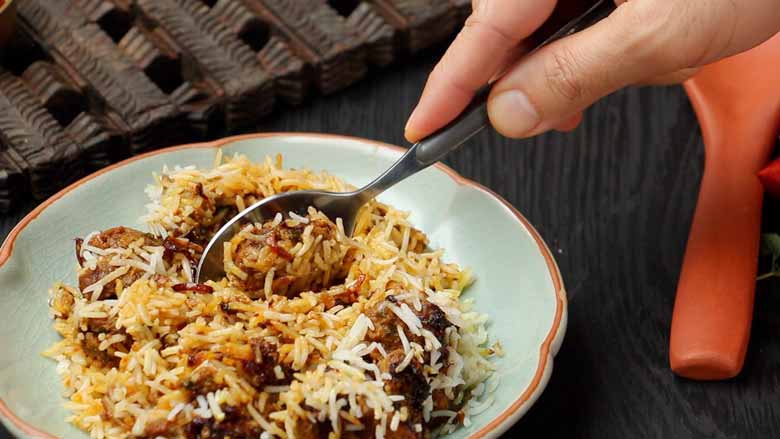
- Unseal the handi / pan on the table for your guests to enjoy the aroma. Serve hot cutting through all layers.
Cook’s Note: It’s important that that the onions are not browned too much as they tend to take on a bitter flavor. The onions should be just beyond golden-brown and should get crispy upon cooling. They should still have a sweetness to them and should not be bitter. In case your onions turn bitter, discard them and fry a fresh batch of onions. The burnt flavor of onions will overpower the biryani. These delicious crispy fried golden brown onions are known as birista or beresta.
Serves: 4 as part of a larger meal
Prep time: 20 minutes plus 30 minutes unattended soaking and marinating time
Cook Time: 78 minutes
- Clean and wash the rice: Place rice in a bowl and wash under running water, gently stirring and mixing the rice with your hands, draining each time the bowl fills up. Do this 2 or 3 times till the water runs clear; then let soak in fresh water, covered, for 30 minutes.
-
-

-
RATE IT:


-
 Vegetarian
Rice
Spicy
Indian
Chicken
Healthy
Vegetarian
Rice
Spicy
Indian
Chicken
Healthy -
Easy
Dessert
Soup
Paneer
Salad
Vegan
-
Lunch
Fruit
Kid Friendly
Appetizer
Sweet
Chettinad
-
Festive
Baked
Snack
Breakfast
Chocolate
View All


Tender mouthfuls of juicy vegetarian soya chaap...
Biryani Masala recipe: If you love biryani and ...
Malpua Recipe: Let’s celebrate Holi with ...
Kadha is an immunity-boosting traditional Ayurv...
Vrat ke chawal, sama ke chawal, or sama rice is...